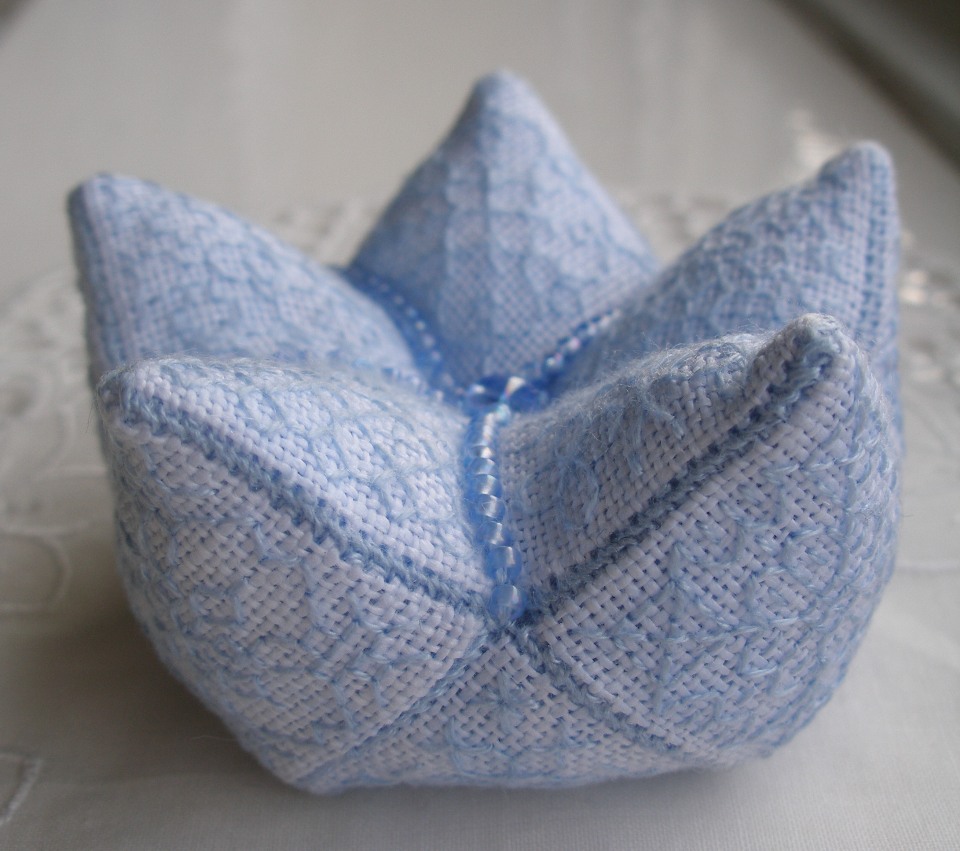
Following this idea, I attached the top on a different orientation - very simply but a very different result!
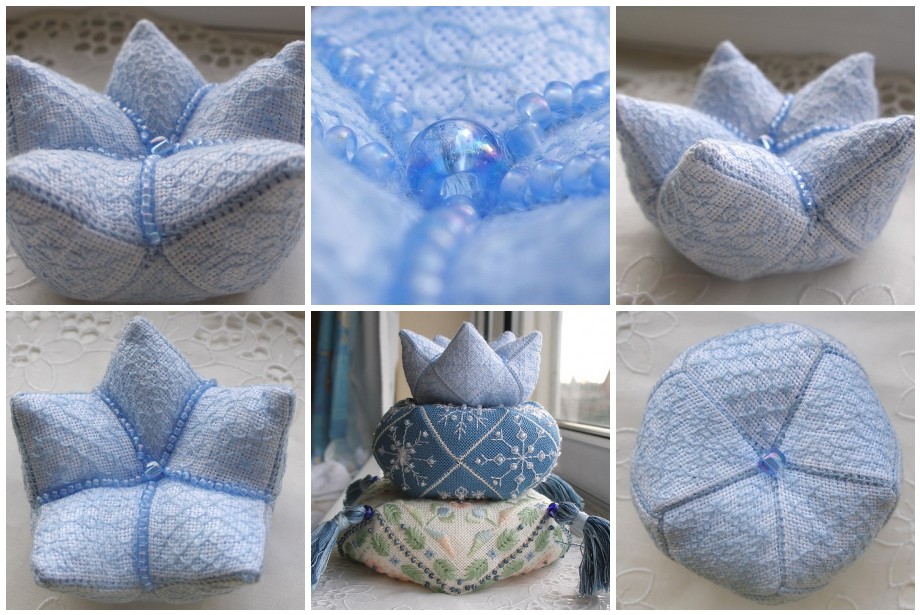
I've stitched it on 32ct Vintage Blue Zweigart linen using DMC 3840 (I think) - I should maybe have used a darker blue floss, but I still like it as it is. The beads are Mill Mill seed and pebble beads.
The way to make this kind of shape is very similar to making the more rounded 15 sided biscornu.
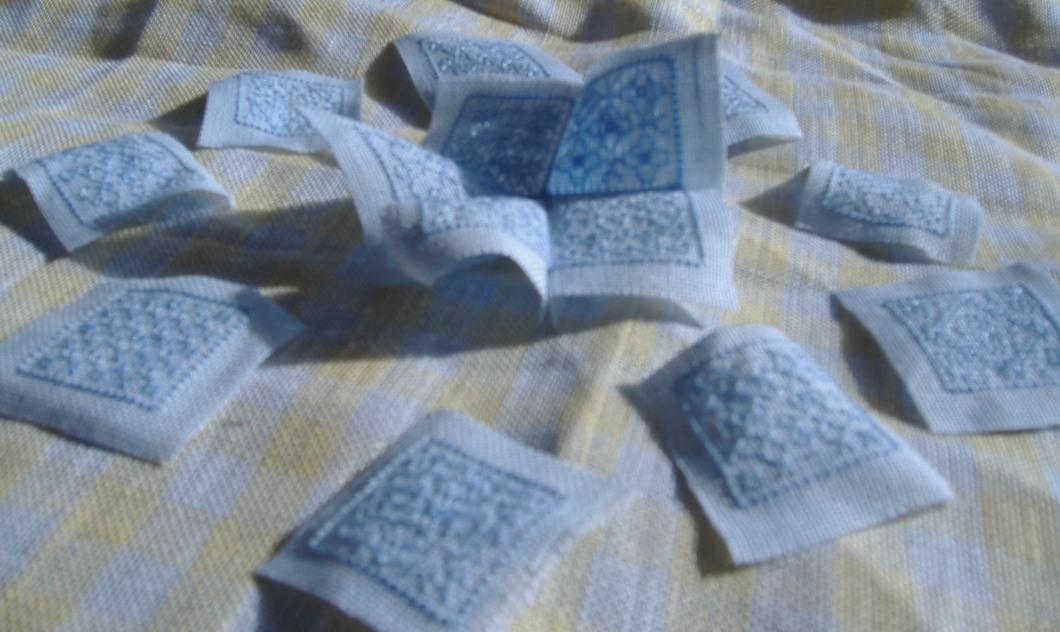
- Stitch your 15 squares, all the same size.
- Join 5 together to for the top and another 5 for the bottom - you will have 5 left for the sides. Join the five sides to either the top or the bottom - this will give you a kind of bowl shape.
- I realised something at this point that I could do to illustrate the difference between the two kinds of 15 sided biscornu -
For the 'normal' rounded version, join the 'peaks' of the flattish side to the 'valleys' of the bowl.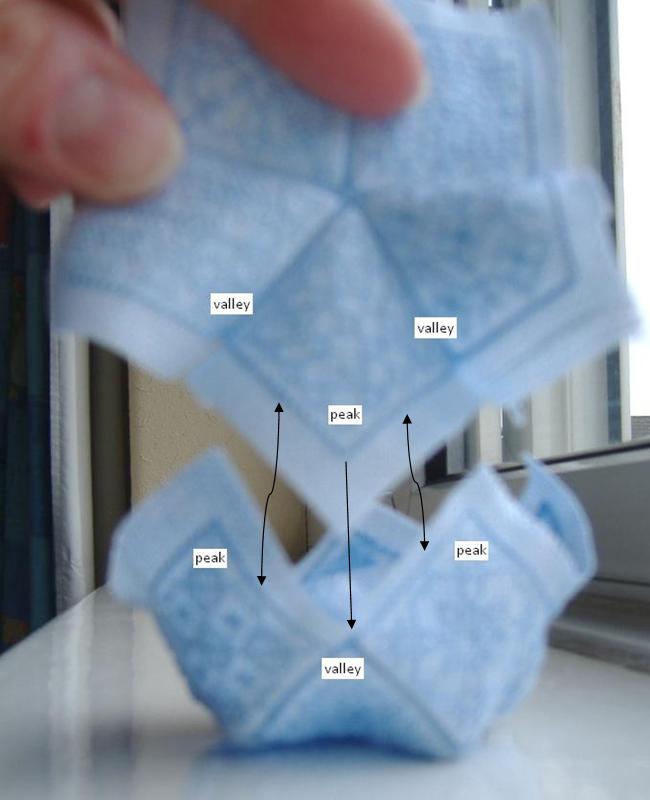
For the alternative version, join the 'peaks' of the flattish side to the 'peaks' of the bowl.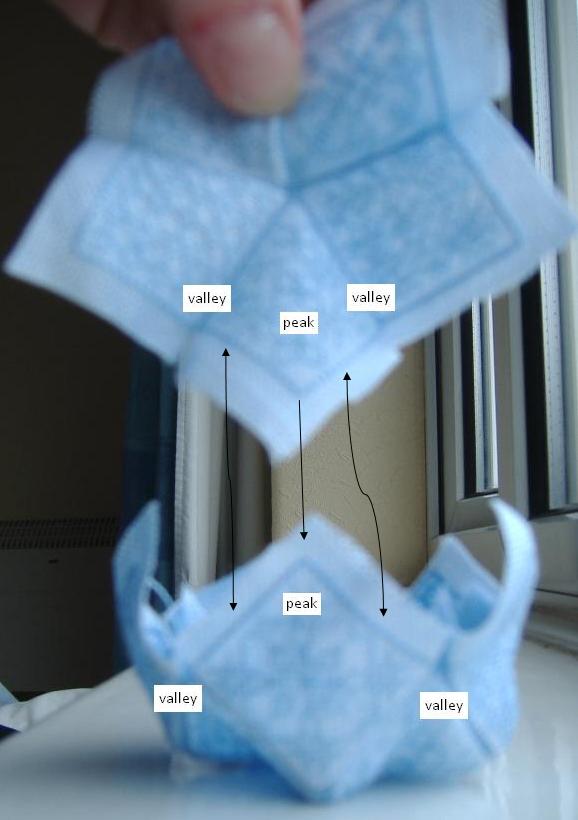
Remember to leave a gap to stuff your biscornu and then sinish stitching together. I found the final stitching together a bit more awkward for this alternative version than previously. Of course, it didn't help that it wasn't until I had finished sewing it all together that I decided to add the beads to the top!
I hope this sense - just the simple change in the orientation of the top makes a complete difference to the final item!
My original 15 sided biscornu tutorial with more detailed instructions can be found here.
28 comments:
That's really, REALLY pretty! x
Cool, how clever, i like them all in a tower, very effective Lesley.
Hey! GREAT job and another good idea for those little beauties! Working on my very first two biscornu's because of your blog and tutorials! Thanks so much for sharing!
Interesting variation. Kind of looks like a crown. Great finishing job!
What a clever clever idea. That is totally cute!!
Great idea to finish it that way....I have already stitched 5 squares and can´t wait to start sewing mine together;-))
Gaby
Really, really interesting. What a great shape.
Well, now you have outdone yourself. I did not think there was another way to pretty up a stitch. Very nice job
Really, really pretty stitching.
Great idea, love the look.
How pretty! I've seen this shape on a quilting blog (using just fabric) but think your stitched version is so much nicer.
Beautiful stitching and finishing!
Margaret
Clever, very clever finishing! Love the stack of biscornu too.
Wow, what a great idea. It is a little flower now. I did see many different biscornu's with this design, but yours is very different ;o)
Greetings Anita
stitch-creations.blogspot.com
That's great!!
I love the new way of assembling a 15 sided biscornu - makes it look like a starfish ^^
beautiful work !
Wow what a fantastic idea and it looks so pretty!
When I look at your blog in Firefox I can see your followers at the bottom. Looking at it in IE the header for followers is in the side bar but I can't see them! Seems strange.
It's gorgeous Leslie, congratulations
How very nice! I really love the way it turned out. I will have to give it a try one day. Thanks so much for taking the time to present a tutorial.
Lesley your biscornu's are fabulous, what lovely finishes!
Great job in finishing the biscornu!
Julie, what a creative idea you had. This way of assembling looks like the top of a flower. Very nice!
Sorry for using the wrong name, I meant to say LESLEY.
What a neat design! It looks like a flower opening up.
Thanks for sharing the idea I'll be sure to try this. Hafrun Asta
This is a lovely biscornu.
Thank you for the instructions.
Now that is a neat idea. It definitely goes in my list of to-dos. I made a set of smalls for my 13-yr-old granddaughter, who has started cross stitching. It started with some forget-me-not Jacquard ribbon, so the forget-me-nots were the theme through the set. I can make her that pin cushion to add to the group.
I am just about to attempt my first 15 sided Biscornu, and i would just like to say thank you for showing how it's put together very helpful indeed :)
trop trop beau biz
Post a Comment